With the appearance of a child in a family, its members receive a lot of troubles and responsibilities. So, first of all, the baby should be well-fed and well dressed. In this case, he will be comfortable, and the new mother will be twice as calm.
Nowadays, the creators of children's products offer many different diapers. These can be products with Velcro or in the form of panties. They are suitable for single use. After use, such a product is thrown away. You can also purchase reusable panties with special inserts. The inside of such a diaper is pulled out and goes into the wash.
Many mothers use grandma's methods to help them save money. Our article will tell you how to create gauze diapers with your own hands from different materials . These products can be used several times. All you need to do is wash the fabric and dry it.
What it is
Gauze diapers are an excellent alternative to store-bought diapers. They are good because they allow the baby’s skin to have maximum and complete rest compared to diapers made of synthetic materials. In addition, this is the main classic baby hygiene product made from natural materials. Suitable even for baby's sensitive skin.
DIY diapers
At the same time, it will be very simple to make such waterproof pads, asking yourself the question of how to sew gauze diapers for newborns: just take good quality pharmaceutical gauze and wrap the baby with it using one of the popular techniques.
Gauze blotters
Why moms are returning to gauze diapers
Sewing technology
Gauze diapers can be purchased at baby stores or pharmacies. But most women prefer to sew them themselves. This way you can be sure of the quality of the product and choose the appropriate thickness and size. Choose material with a dense structure. If it is too loose, it will wear out quickly - the threads will move apart and lumps will form. The fabric must be cut into pieces of the desired shape. Fold in several layers, make a triangle or square. Machine sew the edges.
Old bed linen is also suitable for sewing. After repeated washings it becomes thin and soft. If your supplies are not enough, contact your friends.
Size
The size of the initial blank depends on how large the baby is born. If you decide to create a trousseau with your own hands, it is better to make diapers “with reserve”, meter by meter. The size of the piece of material also depends on how you want to roll it.
Ways to fold a diaper
"Klondike"
You need to take a piece measuring 90 by 180 cm, fold it in half and diagonally. You will get a scarf containing 4 layers of fabric. Place the child on it. Bend the lower end to the navel between the legs. Tuck the free edges into the “belt” or simply wrap it around the baby’s belly. Suitable for babies who have not yet learned to actively move.
"Rectangle"
From a cut of 60 cm by 100 cm, make a rectangle 20 by 60 cm. Fold the narrow edge, increasing the protection from getting wet. Place between baby's legs. The configuration resembles the shape of a women's pad. To secure the diaper, sew ties from gauze. The benefit of this method is that it is suitable not only for newborns, but also for older children.
"Hungarian"
The initial size of the square is 90 by 90 cm or 60 by 60 cm. Fold in half. Take the right cut and fold it in half. You can make a scarf by bending the top corner. Turn over and seal the center by folding the loose piece of fabric several times. Place the child on the triangle and thread the bottom corner between the legs. You need to lay the baby on it, threading the lower end between the legs. Secure the right and left parts to the stomach. It is better to master the technique of this method from a photo.
"Two in one"
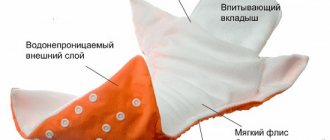
Take a disposable analogue, remove the filler from it, which absorbs and retains moisture. Instead of the contents, place gauze there, folded into a rectangle. This design will remain dry on the outside. A damp fabric insert must be changed on time.
There are several ways to secure a diaper on a child:
• elastic band with Velcro; • put on tight pants over the top; • wrap the legs in a diaper; • sew and attach ribbons.
Even women who do not know how to sew can make cloth diapers with their own hands. The gauze must be folded using one of the methods indicated above, leaving the sections unprocessed. Products without seams will be less durable and neat, but their beneficial properties will not change.
Wash
It is enough to rinse a wet gauze diaper in clean water or wash it in the machine along with the diapers. For dirty ones, it is better to buy a bucket with a lid, pour water into it, put baby powder and put them there during the day, rinse and soap with laundry soap before machine washing so that no stains remain. After drying, iron. For newborns, you need to prepare at least 20 diapers; if there are enough, you can throw them away after stool.
Features of use
The main advantage of gauze diapers compared to disposable analogues is that they allow air to pass through better, but this quality can be reduced to zero if you do not take care to immediately replace them when wet or dirty. Damp fabric irritates the skin, which can lead to diaper rash. Low moisture capacity makes it difficult to use them for walking and sleeping at night, so mothers often wear “diapers” outside and at night, and the rest of the time they use gauze diapers. There is a significant saving of family funds, and the duration of walks and relaxation do not suffer.
Don't worry that you or your child won't like hygiene products made from gauze. Instead of or after direct use, they can easily be turned into bibs and then into household rags.
Making diapers from gauze with your own hands is not that difficult. The main thing is to have desire and a little patience.
Do you know: How often to change diapers for a newborn
Advantages and disadvantages
Like purchased models, homemade ones have advantages and disadvantages. On the positive side, it can be noted that in this way there is a saving on costs, since one gauze pack is enough to make 25 products. In addition, similar products:
- help the skin not to warm up or become hot;
- are absolutely environmentally friendly and safe for children;
- suitable in volume, since each is made for a baby;
- wears off very quickly.
Note! You can sew reusable diapers with your own hands, but it is worth noting that such products are fixed quite tightly, irritate the skin, and if they are wet, they leak. Therefore, they need constant washing and changing; it is impossible to go out for a long walk.
Benefits of reusable diapers
Reusable diapers, unlike disposable ones, have a number of advantages that help parents save their family budget and help their baby feel comfortable. After all, disposable diapers are not cheap and their consumption is quite high, but reusable ones can be washed with baby powder and used for a long time.
Reusable diapers are conveniently fastened with buttons, the removable insert consists of several layers of special fabric - microfiber. This fabric does not cause irritation to the child, especially in the summer, unlike disposable diapers. It does not need to be ironed.
Components of reusable diapers
Sooner or later, a child needs to be potty trained, and in this case, reusable diapers will help you in this matter perfectly. The whole point is that in disposable diapers the baby does not feel discomfort and it will be more difficult to train him to go to the potty. In reusable panties, the child will not feel so comfortable and will sooner begin to realize the need to ask to go to the potty. The savings on the family budget will be quite noticeable.
Is it possible to do without diapers?
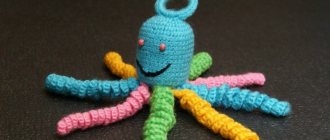
You can do without homemade diapers by replacing them with store-bought ones. However, according to the results of many surveys of married couples, prolonged wearing of purchased products causes diaper rash with allergies, itching and addiction. Interestingly, many manufacturers are already creating gauze, soft and comfortable patterns. For example, this is the company Octopus, Vitosha and Our Mother. It is worth noting that their products are in demand.
Popularity of Octopus products
Gauze blotters come in different sizes for girls and boys. There are basically three types of products that can be sewn depending on how much the baby weighs and how many months he is:
- For infants up to one month and up to 5 kilograms, products with a diameter of 60 centimeters are suitable
- For children from one to three months up to 7 kilograms, blotters with a diameter of 80 centimeters are sewn;
- For children from three months to 9 kilograms - ordinary products with a diameter of up to 60 centimeters, 180 by 90 according to the headscarf and 90 by 90 according to the Hungarian method.
Note! It is worth noting that the size will depend on the characteristics of the child and the characteristics of his development, physique, and waist.
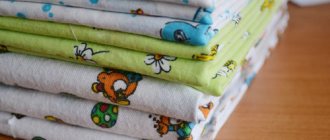
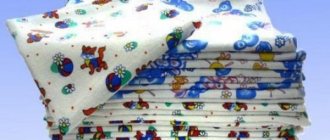
Types of fabrics
It is worth noting that gauze is not the only material from which blotter cloths are made. As a rule, other fabrics such as chintz and flannel are also used for this purpose. Chintz is a material that does not cause allergies. Refers to natural and breathable materials. Flannel is a cotton fabric that is pleasant to the body. Can absorb moisture well. Suitable for even the most delicate baby skin. The last material, namely madapolam, is a dense gauze composition that does not contain dyes that cause allergies.
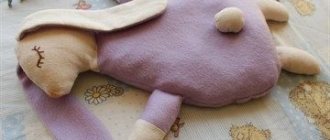
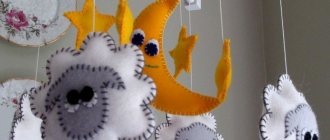
Flannel as a type of suitable fabric
DIY sewing
To make a disposable diaper, you need to take one of the listed materials and a thread threaded into a needle. Next you need to follow the diagram below:
- Cut the fabric to the appropriate size for the child’s age and parameters;
- Overcast the fabric edges and fold them one to two centimeters on each side so that the fabric does not fray or unravel, and the product becomes reusable;
- Fold the fabric in half to form a square and turn it over with the fold down;
- With your left hand, move the edge from below to the center and turn the workpiece over to the other side, wrapping it in the same way;
- Sew up the curves of the workpiece for more comfortable wearing.
Folding techniques
There are three methods on how to roll gauze diapers. They can be made using the Hungarian method, a scarf and a rectangle.
Hungarian method
It consists of turning waterproof rags into panties. The method involves folding the gauze or fabric in half, folding the corner again from left to right to the top corner to make a triangle, and flipping the piece back over to make a triangle.
Hungarian method
According to the scarf technique, you need to fold the cut into a triangle, spread it out and lay the baby on top. Next, you need to lift the bottom corner up and connect the side corners so that they do not come undone.
Rectangle
There are two ways to roll using the rectangle technique. In the first case, you need to make two strips of fabric, put them on top of each other, and then place the child on them so that half of the homemade panties protrudes. Then you just need to bring the bottom part up to your waist and tie it with a ribbon. According to the second method, you need to make a belt for such panties by placing ribbons inside the product.
Rectangular method
Manufacturing of waterproof liners
All that is needed to make waterproof liners is to sew a flannel or bamboo measuring 30 by 40 centimeters and put them under the child’s regular panties. As a rule, you need to fold the fabric 3-4 times so that it absorbs more liquid. Be sure to iron all items before use.
Waterproof liners
Washing and care
Washing and caring for reusable blotting cloths is very easy. It is enough to regularly wash them by hand without bleaching agents in ordinary laundry soap, and then dry them on a radiator or clothes dryer. Before use, iron items on both sides.
Washing and care
Sewing gauze diapers for newborns step by step is not as difficult as it might seem. Gauze is a natural and breathable material that will allow the baby’s bottom to breathe and not sweat. You can make such reusable or disposable blotter cloths using the technology presented above. They are easy to wash and care for. It is enough to periodically wash with soap with your own hands.
Required materials and tools
To sew an unusual baby hygiene item, we will need simple materials that can be bought at any textile store.
- Textile. For children's clothes, 100% natural fabrics are ideal at all times; up to 5% lycra is acceptable. I sewed a diaper from baby flannel. It is very soft and pleasant to the body, and most importantly natural.
- Elastic band. For a tight fit on the back and legs, you will need a regular elastic band 0.5 cm wide. For one diaper you will need approximately 20-30 cm.
- Disposable diaper for newborns. We use it to create a pattern.
- Scissors, thread, pins.
- Sewing machine. It will be difficult to sew the MP manually, so it is better to use a special device. If this is not the case, then you can turn to the studio next door for help.
- Velcro. With its help, the diaper is fixed on the child. Buy 50 cm and it will be enough for two products.
When all materials are prepared. You can start cutting out the details and sewing the best diaper for your baby.
The photo shows the necessary materials for making a cloth diaper
How to sew reusable diapers with your own hands?
Recently, reusable diapers have become an alternative to disposable diapers. After all, our mothers and grandmothers used these diapers. Only they made reusable diapers for newborns with their own hands, but modern manufacturers produce improved models and they are not cheap. But even with minimal knowledge of sewing, you can sew a diaper yourself.
DIY diapers. The benefits of homemade diapers
- Significant savings on the family budget (the fabric used to sew homemade diapers costs several times less than ready-made diapers).
- The composition of the material is absolutely clear (when buying fabric from your mother, you always have the opportunity to carefully select natural fabric).
- Air exchange in fabric diapers is complete , unlike factory ones.
- Lack of fragrances and moisturizers , which can lead to allergies.
- Minimum harm to the environment.
- DIY diapers are always at hand . No need to run to the store to get them if they run out.
How to sew a reusable diaper with your own hands?
Before you start sewing, you need to figure out what parts the diaper consists of. These are panties and liners. To sew panties, use cotton, flannel, or fleece, which will come into contact with the baby’s delicate skin. For the absorbent layer (liner) you will need microfiber and gauze. To secure the diaper, snaps, Velcro, and buttons are sewn on.
For the panties you will need two pieces; when cutting, you need to leave allowances for the seams. The cut out parts are placed right sides to each other and stitched without sewing up the pocket for the inserts. An elastic band is inserted into the waistband and along the legs. The diaper is turned inside out and the fasteners are sewn on. A microfiber or gauze insert is inserted into the pocket. The product is ready.
Sewing reusable diapers yourself has its advantages:
- saving money. Pampers or store-bought reusable diapers are quite expensive;
- environmental friendliness. The natural materials from which the diaper is made will not harm the baby’s skin;
- absence of fragrances will protect the skin from an allergic reaction.
With your own hands
Homemade diapers can be made for both disposable and reusable use. The first is a square or triangular piece of gauze, which, like factory diapers, is wrapped between the baby’s legs. Reusable is made of fabric, more dense in its composition, from natural cotton material. Replaceable gauze diapers are placed inside the panties. Such models are washed a couple of times a day, and disposable ones must be washed immediately after a single use.
A disposable diaper is made from cotton fabric, similar to gauze, but denser. Let's look at its production step by step.
- We take a piece of fabric in the form of a square, with sides of 80 cm. For hemming, you can take a piece a couple of cm larger. We overcast or stitch the edges of the fabric on a sewing machine, then fold the square in half. Place the fabric on the table with the fold down.
- We take the upper edge of the fabric cut with our hand on the right, and the lower edge on the left, then carefully pull the upper edge to the right, and move the lower edge to the middle of the top line, thus constructing a triangle. We turn the triangle on the reverse side and fold it towards the center. There should be a slight overlap of fabric in the central part of the diaper. You can then stitch the resulting seal to the base, saving a lot of time on folding the fabric in future use.
- To put on this diaper, you need to place the resulting scarf at an angle downwards, lay the baby down and place the lower edge of the scarf on his tummy. Then we take the remaining ends from the side and twist them inward, trying not to create discomfort in the baby’s tummy area. You can add Velcro to the edges to make it easier to secure the diaper.
Making a reusable diaper yourself is also not difficult, since the technique can be used the same as for making disposable diapers from gauze. You can change the method. The difference is the use of denser fabric; fabric from previously used bedding is perfect here, as it will be soft enough for the baby’s delicate skin. Soft cotton material, chintz or calico are also used.
When making reusable products using the method described above, we do everything the same, only we use thick fabric. This method is not recommended for newborns due to the density of the fabric and the inconvenience of putting on panties, but if we install Velcro, they will become more comfortable. In the center, a kind of pocket is sewn inside using waterproof material (soft oilcloth), thereby preventing possible leakage.
Then we make gauze pads; they will require replacement after each soaking. It is recommended to prepare 10-15 such liners. We fold the gauze so that we get about five layers and sew it on the sides. Our reusable diapers are almost ready. The final touch will be attaching buttons to the sides of the product. The sides of the diapers will be securely fastened and will not come unfastened during the baby’s active movements.
The next method of making a diaper can be used by folding the diaper into a scarf. Take a piece of fabric 90 cm by 90 cm. Fold the fabric straight, then lay it diagonally. We lay the baby down and pass the free end between the baby’s legs. We make a belt from the ends on the sides by tying the ends of the fabric into small knots. You can also use Velcro. So we can highlight the following advantages of using reusable gauze diapers:
- gauze will protect the child’s skin from irritation and chafing, and it is worth highlighting its environmental friendliness;
- since the inserts are changed frequently, feces do not come into contact with the baby’s sensitive skin, the sterility of the product is ensured;
- saving money;
- does not require much labor to manufacture, folding and sewing such products is quite simple, and the material can always be found at hand;
- there are no excessive flavorings in the gauze;
- gauze products are environmentally friendly.
Until disposable diapers were invented, there were no other options: in a family where a child was expected, gauze diapers for the newborn were made in advance with their own hands. This was the first clothing for a baby at the beginning of life.
Now gauze diapers are increasingly giving way to disposable diapers and are considered a legacy of antiquity. But don’t immediately discard the option of gauze diapers.
Reusable diaper pattern
The pattern for sewing a diaper is very simple, just take a disposable diaper and trace it with a pencil. Reusable models can be used from birth to 2 years. Therefore, diapers must be sewn according to the baby’s size. Reusable diapers have 3 sizes A, B, C, but if you focus on diapers, there may be more.
Models are sewn depending on the weight of the child. You can make a universal diaper - this is a product with buttons or Velcro that adjust the size.
Using a pattern, you can sew a reusable diaper for newborns with your own hands, even if you have basic sewing skills. First, you need to decide what size the diaper will be and what material it will be made of.
The diaper is ready, all you have to do is insert the insert and put it on the baby.
Pattern of a reusable diaper with Velcro. A very comfortable Velcro diaper model. To sew a reusable Velcro diaper using a pattern, you need to do everything the same as when making a simple diaper. The sequence of actions is maintained. A distinctive feature will be sewing Velcro, 18 m long, to the front side (on the tummy). For fastening, 4 pieces of Velcro (2 on each side) are attached to the inside side.
- Take a diaper or a finished pattern and apply it to the fabric folded in half. Trace with a pencil and cut out. One piece can be made of cotton or flannel, and the second one can be made of mesh for the inner layer. When cutting, leave seam allowances of 1-1.5 cm.
- The parts are sewn facing each other, leaving unstitched space for inserting the liner.
- On the waistband, on the back side, we leave a drawstring to sew in an elastic band.
- Sew the elastic along the legs, on the back side of the part.
- Turn the product inside out.
- On the front side, on the tummy, at pre-marked points, you can sew buttons or snaps.
How to make reusable diapers with your own hands? Cutting and sewing reusable diapers is an easy task, even for inexperienced seamstresses. It is quite possible to sew reusable diapers with your own hands, simply using a disposable diaper as a basis. A pattern is made from it, 2 parts are cut out (external and internal), and sewn together.
A pocket is specially sewn or left for the liner. Velcro, buttons, snaps are used for fastening. If difficulties arise, a master class on sewing reusable diapers will be useful.
We sew a reusable diaper for a baby
Reusable diapers come in different types (all in one, with inserts with wool pads) in this master class I show how I sew a pocket diaper. You can use this diaper starting from 5 months, when the baby’s stool becomes stronger and less frequent. For younger children, I recommend flannel (or better yet, bamboo) diapers and a waterproof padding on top or woolen shorts.
In order to sew a reusable pocket diaper, we need a piece of laminated PUL fabric measuring 50*50 cm (a size 80-86 diaper is shown here), the same amount of mesh fabric for the inner layer, a diaper pattern (I use a free pattern from Otobre magazine) and Velcro 4 cm wide, 20-22 cm long, elastic band 0.5-0.7 cm thick, 40-45 cm long, scissors, fabric pencil, thread, thin needle for stretch fabric, pins and good mood !
1. Fold the fabric in half, pin the pattern, mark everything that is on the pattern - the places where you then need to sew an elastic band, Velcro. Cut it out. transfer all the marks symmetrically to the other half. We do the same with the mesh fabric.
2. Pin a strip of Velcro 18 cm long (fluffy side) to the front side of the PUL fabric piece. Sew around the perimeter.
3. At the opposite end of the PUL fabric piece, make a drawstring for the elastic at the marked points. This is what you get
We apply an elastic band along the entire length (mine is 22 cm), fold it in half 11 cm - this is the length we need. we cut off the length we need, thread the elastic, stitch along the edges several times so that the elastic is secured at the ends.
4. Take a piece made of mesh fabric. We process the back part (at the marked points) with a zig-zag seam or overlock.
We pin both parts face to face. Sew along the edge, leaving the back with elastic open.
5. Apply elastic along the marked points around the legs. fold it in half and get the desired length (if the elastic is tight, add 1-2 cm). We apply it to the starting and ending points, go through it several times with a machine (back and forth) to secure the elastic at the ends. Important!sew behind the main seam close to the edge!
6. Turn it inside out.
We pass the machine along the edge, retreating 0.5 cm. We stop near the rubber bands. When making a “drawstring”, it is important not to catch the elastic band itself; to do this, keep the elastic band in a stretched state and as close to the edge as possible.
Here's what happens:
7. Cut out 4 Velcro pieces measuring 2*4 cm. 2 pieces with the fluffy side, 2 pieces with hooks. Sew to the marked points on the inner layer of the diaper.
Don't forget to close the Velcro before washing!
That's all! The diaper is ready!
All that remains is to insert the absorbent layer and safely put it on the baby.
Let's now talk about how many of these headsets will be needed for everyday use. My son needs 5 of these pads, if he pees, then I just rinse it under the tap and hang it to dry, if he does something serious, then I shake everything into the toilet, rinse it and put it in the wash with the liners (you can, of course, wash it, but I don’t always there is time) and so on in a circle. We wash the pads together with the pads in the machine every 2 days and dry them flat. do not add fabric softener, do not add vanish, etc...only washing powder.
DIY inserts for reusable diapers
It is not necessary to buy inserts even for store-bought diapers; such a simple item can easily be sewn yourself. To do this, you can simply fold a terry towel or gauze or microfiber several times and stretch it out. The resulting rectangle is inserted into a special pocket. Some mothers make a wool liner; it absorbs and washes well.
How to sew an insert into a reusable diaper? For the liner you will need microfiber or cotton, flannel, and a terry towel. Cut out a rectangle from the fabric and fold it several times. You can round the edges of the liner or leave them sharp, as desired. The edges and the middle are sewn together.
Pattern for a reusable diaper for newborns
How to make a reusable diaper from gauze? Gauze diapers are sold ready-made, but they are also very easy to sew. To do this, you need to choose a dense material. For DIY reusable gauze diapers, you will need about 1 sq.m of gauze. For a diaper in the shape of a scarf, take a 180x90 cm piece, fold it in half, and then diagonally. The resulting triangle is stitched along the edges. For a rectangular diaper, you need to cut the gauze 100x60cm and fold it in half until you get a piece of 60x25. The short sides are stitched or hemmed by hand.
DIY gauze diapers
Many mothers, due to their environmental beliefs, in order to save the family budget or because of the baby’s allergies, prefer “grandmother’s” reusable gauze diapers. Of course you can buy them. But it's much cheaper to do it yourself. But it's quite simple! By the way, not even everyone knows how to use gauze diapers. And mastering the “technique” of putting on a gauze diaper is not difficult, so even your mother or grandmother’s skill lessons won’t be useful!
How to make a diaper from gauze?
There are three ways to sew a gauze diaper:
Method 1 – “scarf”: From a gauze cloth you need to cut a rectangle with sides, one of which is 2 times larger than the other. Calculating the size of gauze diapers is quite easy. So, for example, for a newborn a piece of fabric with a length of 60 cm and a width of 120 cm is suitable. For a baby 1-2 months old, it is better to cut a rectangle of 80x160 cm. And a three to four month old baby needs a piece with a base of 180 cm and sides of 90 cm. By folding the fabric in half, a square is obtained, the edges of which must be processed manually with an overcast stitch or on a sewing machine with a zigzag or overlock around the perimeter. If the product is folded obliquely, a triangle emerges - the so-called “kerchief”. Place your baby in the middle on it so that the long side touches his waist. Pass the lower end of the diaper between its legs, and place the side ends on top and secure.
Method 2 - Hungarian. There is another way to fold a gauze diaper into a “scarf” - the Hungarian way. To do this, fold the gauze diaper in half twice until you get a square (1, 2). Holding the corners of the diaper, one of the free corners is pulled up (3). Turning the figure back to front (4), the upper layers of the diaper are rolled into a roller (5, 6). Now you can put the baby in a diaper in the same way as with the “kerchief” (7,8,9).
Method 3 – “rectangular”: Gauze fabric is folded in several layers to form a rectangle with sides 90x20 cm. To maintain the shape, the diaper should be sheathed around the perimeter. Before putting on a gauze diaper, fold it in half lengthwise and thread the ribbon through. Just place a rectangle under the child so that the fold of the fabric with the rope is located at waist level. Drape the loose end of the diaper over the front of your belly button. You can wear warm fabric (fleece) on top. Tie the string in a knot in front of your stomach. Ready!
Many inexperienced mothers are concerned about how many gauze diapers they need. It is believed that the quantity of 20-25 pieces is quite acceptable.
Washing gauze diapers
And finally, a couple of tips on how to wash gauze diapers. After use, they can be washed by hand or in a washing machine at 60-90°C with baby powder. But after bowel movement, the diaper should be rinsed under running water. We hope our recommendations on how to make and use gauze diapers were helpful!
Is it possible to baptize a child? There are situations in life when a child’s godfather does not fulfill his duties, or even abandons his godson altogether. And then the parents have a question: is it possible to baptize the child? You will learn the answer to this from our article. Herbs for bathing newborns Bathing a newborn is one of the most enjoyable baby care procedures. And you can make it even more useful by diluting herbs in the bath, which have different effects: calming or restorative. Read more about herbs for bathing in our article. A baby's long, sound sleep is usually perceived by young parents as a good opportunity to rest. If the child eats well and shows no signs of discomfort, this is good.
If the baby’s drowsiness is associated with lethargy, this is worth paying attention to. The child throws his head back One of the actions performed by the baby that is not entirely clear to parents is throwing his head back, sometimes during sleep, sometimes during wakefulness. You will learn about the causes and ways to solve this problem in our article today.
WomanAdvice.ru
How to turn a disposable diaper into a reusable one?
To make a reusable diaper, you can take used diapers. Using scissors, cut off the top inner layer. All the insides are taken out of the diaper and thrown away. It is worth making sure that all edges are trimmed neatly.
The empty diaper is thoroughly washed and dried. Now a gauze or cotton cloth folded several times is placed inside the panties. It turned out to be a reusable diaper without difficulty.
How to make a reusable diaper out of diapers? Take a used or clean diaper and take out the inner filling. Wash and dry the diaper. For its further use, we put rectangles of gauze and cotton inside. Using scissors, you can make a reusable diaper from a disposable one.
How to make a reusable diaper
You don't have to be a professional dressmaker to create a diaper. The pattern is as simple as possible and is created on the basis of a traditional factory diaper. Quite often, fleece is used for such hand-made production. The child’s skin, despite the synthetics, breathes well in it without sweating.
- A standard diaper is outlined on paper with a pencil.
- A centimeter (allowance) is added on each side.
- The pattern is transferred to pre-washed fabric.
- After cutting, elastic bands are attached from the back and along the folds for the legs (in accordance with the original).
- Next, the Velcro is sewn on.
- An insert made of gauze, cotton or terry cloth is placed in the finished panties.