The magic of charm » Family and children
The child enjoys exploring the world around him. He is interested not only in toys, but also in all objects around that can pose a danger: sockets, switches, sharp objects, and more. Therefore, parents constantly feel tension, worry about their baby, and are afraid to let him out of sight.
A busy board will come to the aid of moms and dads. This is a “smart” touch board that you can make with your own hands without much effort. The developmental board was developed by Italian teacher Maria Montessori. It was she who promoted the theory of raising and teaching a child based on independent knowledge of the world through the senses.
You can either buy a busy board or make it yourself
What is a business board?
This is a game development board with various parts and elements located on it that are safe for children to play. Such parts are capable of moving, opening and closing, clicking, rotating, lighting and blinking, and making sounds.
The bodyboard may include:
- padlock, latches, latches. Children will open them, close them, push them in;
- a doorbell with a soft sound, a clock dial;
- buttons and switches - after pressing them, the light comes on;
- an old telephone set, the circle of which must be twisted with your finger;
- a socket not connected to electricity, and a plug connected to it;
- ribbons, laces and ropes from which children will tie bows;
- snaps and buttons, zippers and various fasteners;
- shreds from pieces of fabric, oilcloth, paper, foil;
- abacus or beads - the child will sort them out in his hands.
You can decorate the development board with pictures of nature, drawings of animals and birds, images of letters and numbers. You can add whatever your imagination desires to such a product. The busy board can be constantly supplemented with new elements when the child grows up or becomes uninterested in playing. You will understand this yourself by his behavior.
What is a busy board?
Many parents who hear about such an educational toy for the first time ask a rather simple question: “Busyboard? What is it?"
A busy board is a board on which various elements are placed that a child can play with and develop fine motor skills without the risk of injury. All parts of the bodyboard can be opened, closed, turned on and off, pulled, rotated, etc. At the same time, some of the elements can even make various sounds, flash and light up.
A developmental board for a child may contain:
- Switches, buttons and doorbells, when pressed, will turn on the light or ring the bell;
- Locks, latches, latches and other elements that a child can safely open and close;
- A clock with hands and dial, as well as an old rotary telephone with a handset;
- A plug with a socket, a USB connector with a suitable wire and any other connectors with a suitable connector;
- Laces, ropes, puffs, buttons, snakes, buttons, Velcro, rings, buckles, etc.;
busy board for preschoolers
- Gears that fit together and can rotate;
- Various sorters, Lego cubes, and also games where you need to move a figure along existing paths;
- Ropes with clothespins, wheels, old keyboards or push-button telephones, abacus and beads.
- Magnets, puzzles, drawing boards with chalk, markers or toy drawing tablets;
- Whistles, strings, xylophones, and other things that can make sound.
This is not a complete list of what can be attached to a bodyboard for the little ones. It all depends on your imagination and what the child is most drawn to. Over time, when your baby stops being interested in the topic or other elements, you can replace them with new, more interesting or complex things.
What a development board will teach a child
Today, great attention is paid to the early development of children. Parents try to teach the baby various wisdom early. A busy board is necessary to keep your child busy with an interesting educational game. He will explore the world on his own, even without the help of his elders.
During such exciting activities, the baby develops the following skills:
- logic - the child builds a chain of conclusions: to ring the bell, you need to press a button; to open the door, you need to pull the latch up;
- fine motor skills of the hands - the baby learns to work with small objects, receives new tactile sensations;
- perseverance - a daughter or son will finish the job they start in order to achieve a positive result - tie a bow, open a lock;
- attention and memory - children remember their actions with small details and objects, and later they will perform them automatically.
According to the Montessori method, parents should not interfere with the process of their child playing with a busy board. Let your child find solutions and draw conclusions on his own.
Types of busy boards: choose a board according to the age and gender of the child
You can make a busy board with your own hands by the 1st year of a child’s life. He can play with it from as early as 8 months of age, when he can sit up confidently. As the baby grows, the product should be upgraded.
When creating a development board, parents should take into account the age of the children, their gender, their own interests and hobbies.
Let's look at the features of designing a busy board according to the age of the children:
- For children 8-12 months old, soft models of development boards are suitable. It can be made in the form of a rug or a book. Felt or textiles are used to create the product, all parts are firmly sewn, making them safe for the baby. You can design a colorful pillow with beautiful pictures and details.
- Children 1-2 years old can already be offered a hard bodyboard for playing without sharp parts or corners on its surface, so that the child does not get hurt. The child becomes familiar with fastening large buttons and lacing ropes. The themes of the pictures are animals, nature, clothes.
- Children aged 2 to 3 years will be interested in learning numbers, shades and colors. Set up a busy board with many windows and doors. To open them, the child must master the lock or latch. At this age, you can offer a development board in the form of a house, car, castle or cube.
- Preschoolers aged 3 years and older should be given more difficult tasks. You can make a large business board for the entire wall of the room, where there will be many elements and details - small and large. Add numbers, letters and syllables to various pictures and drawings on the business board.
Such products not only develop fine motor skills and other skills. They give an idea of the objects of the surrounding world and natural phenomena.
What is needed for production
It’s easy to imagine what a busy board is. The basis of the educational toy is a board or a small square or rectangular stand. Interesting models are made in the form of houses or cubes. To make the base, any dense material whose thickness exceeds 0.5 cm is suitable: wood, fiberboard or chipboard, plastic, plywood. There should be no protruding parts on the surface so that the child does not get hurt.
The list of elements for creating a bodyboard is huge. Requirements for items: they must arouse interest in the child, help him master the world around him in a safe format, develop logic, and train hand motor skills. Another function of the development board is to teach children how to use household items correctly. Most often, the standard set of parts includes:
- Industrial door fittings: latches, hooks, hinges, push, stationary and rotary handles, various types of locks, bolts and latches.
Any small sized valve will do. - Electrical products: sockets, plugs, switches, small light bulbs, toggle switches, terminals, LED elements, sockets, electric doorbell.
- Furniture fittings: wheels, handles and decor.
- Plumbing products: pipes, shut-off valve parts.
- Sewing materials: bobbins, zippers with large teeth, fabric scraps, felt, laces, buttons.
- Elements of leather goods: a magnetic clasp from an unnecessary bag, a button from dad’s briefcase, parts of a belt with a buckle or bracelet from an old watch.
- Spare parts for various mechanisms and electronic devices: calculator panels, watch dials, computer keyboards, telephone dials, remote controls, gears for a mechanical alarm clock, bicycle reflectors and other reflective elements, abacus, compasses.
- Various rollers with a textured surface.
The following materials are also used in the design of a busy board: a children's xylophone, parts of old shoes or bags with clasps or laces, an hourglass, a compass, large chains. The sound effect will be created by battery-powered doorbells, bells, and parts of electronic toys. The lighting will delight your baby; battery-powered flashlights can be used for this purpose.
A busy board can be made according to an individual project and include items found at home that will be of interest to the child. The place where you can get parts for a toy can be a department of accessories, electrical goods, or a furniture store.
The main criterion for selecting all elements is complete safety for the baby. It is advisable to choose sufficiently large and durable parts. All items are carefully fixed to the surface, protruding parts are removed.
Thematic drawings will add individuality to the project, and letters, numbers and inscriptions will complement the content and serve as another educational function.
Look what a masterpiece you can make for a 4-year-old child if you try really hard:
DIY educational board
You can buy a busy board in a store, but making it yourself is much more fun. This process is simply addictive for adults! After all, only parents know what is interesting to their son or daughter. Based on this, they select elements for the intellectual development board.
I will describe my experience of creating a development board. After looking at photos of board layout options on the Internet, I went to a construction hypermarket to select and purchase elements. I didn’t have a plan - which elements I would attach.
Busy board - do it yourself
As a base, I chose a wooden furniture panel measuring 80 by 60 cm. It is easier to process than plywood. And a small board 6.5 cm wide. Because I wanted to make not just a “flat board”, but a three-dimensional one, so that something could be folded inside the opening niches. Remains of laminate worked perfectly as doors and back panels.
I bought the following at the store:
- Small loops (4 cm) - 4 pcs.
- Different handles for doors - 4 pcs.
- Standard and small latches - only 2 pcs.
- Hook shaped lock.
- Constipation in the form of a chain.
- A small bright lock with keys.
- Corner eyes for a lock and for attaching the entire structure to something - 4 pcs.
- Chain for attaching keys to the board - 1 m.
- Overlay for the keyhole (I had the key from the old door).
- Locking pin for interior doors.
- Small magnets for fixing doors - 4 pcs.
- Switch block with socket.
- A small lamp with a diameter of about 6 cm. Powered by batteries (price 100 rubles).
- Doorbell with battery-powered button (price 100 rub.)
- Steel corners for attaching the frame
- Self-tapping screws.
Advice. It is better to fasten each door with 2 hinges, otherwise it will warp.
Advice. It is better to choose iron handles with reliable fastening; a wooden handle - the baby would vomit it very quickly.
Important. At first I wanted to make a plug with a socket, but decided to abandon this idea. So that the child does not practice his skills of plugging everything into sockets around the apartment.
Advice. To prevent the ringer speaker from playing the melody very loudly, wrap it in foam rubber.
I asked my friends for an old phone number. I decided not to use the handset, just the dial for dialing.
From the tools:
- electric jigsaw;
- drill;
- cordless screwdriver;
- wire cutters to shorten screws.
Stages of work:
- I cut the board for the sides and for the “shelves” inside. I also treated them with sandpaper on the furniture board.
- I outlined the placement of the elements. I drew where the doors and holes for the telephone dial, switches, and key would be.
- Drilled holes with a drill. For doors, two diagonally are enough.
- Using a jigsaw, I cut out “windows for the doors” and holes for inserting a telephone dial and switches. Sanded the edges
- I attached the boards to the shield with self-tapping screws at the corners.
- The hinges had to be attached to laminate strips so that they were in the same plane as the doors.
- I screwed magnets to the sides of the “windows,” and metal plates to the doors to secure them in the closed state.
- We fasten the latches and latches with self-tapping screws.
- The bell elements can be hidden inside the box, and only the button can be displayed on the front panel.
- I glued the lamp.
- The back side was covered with laminate panels and secured with self-tapping screws.
- I made a carrying handle on top and corners with eyelets on the sides for attaching the entire structure to the handles of the chest of drawers.
Frame for development board on the reverse side
Advice. This is where it was necessary to shorten the screws in order to screw the plates onto the thin laminate without any sharp ends sticking out.
And this is the front side of what happened
It took half a day to create such a toy, if you bought all the locks/buttons and the wooden shield itself in advance. The baby is one and a half years old - he is very happy. Likes to put different things in there and then take them out 
I also want to paste various bright pictures with cars, animals, etc.
Business board in the form of a board
To make a flat product with your own hands, you will need:
- a reliable base - take for this a sheet of laminated chipboard or plywood with a thickness of at least 10 mm of a suitable size - it depends on the age of the child;
- plaster the material well so that it is perfectly smooth, without roughness. Cover it with varnish or water-based paint;
- to create a busy board you will need tools such as a screwdriver, wire cutters, drill, hammer, set of screwdrivers, scissors, jigsaw, glue;
- make a sketch of the future product. Decide on its shape and size, use your imagination. The development board can take the form of any geometric figure, made in the form of a handbag, a ship, a car, a butterfly;
- decorate the development board to make it bright and beautiful. Place all elements and parts without fastening on the cut and prepared plane. There can be any number of such fragments;
- If you like everything, securely fasten the details to the bodyboard - clasps, buttons, loops, rosettes, beads and more. Make windows and doors that close with a bolt;
- Attach all elements to the bodyboard very firmly and securely. Safety is the main condition of such a game; the child should not get injured.
Busyboard - educational house
The voluminous item is suitable for children over 2 years old. It develops the baby's tactile sensations, imagination and thinking. If you want to construct one, you will need carefully prepared, smooth boards. They must be connected to each other in the form of a cube, using self-tapping screws and bars. Make an original roof for the house, cut out doors and windows with a jigsaw. Secure them with loops.
Busy board in the shape of a house
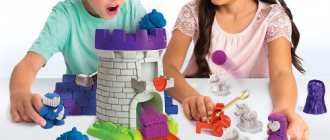
Busyboard castle
Decorate your “building” with chains, shutters, latches, and locks. The options can be any - it all depends on the age and preferences of the baby, his abilities and skills.
Photo: bodyboard cube
Do-it-yourself master class
There are many options for creating a busy board. You can easily find a drawing and instructions for making such a developmental product on the Internet. It is recommended to watch a video master class on DIY boards for girls. You can also come up with your own version of the design.
DIY photo of a busy board for girls
When making a development board for a baby, you need to take into account the age. Features of a busy board for different age categories of girls are shown in the table.
| Age | Design Features |
| 8 months – 1 year | Babies are unable to concentrate on a large number of elements at the same time. Therefore, it is enough to record a few details on the board. The optimal size of a bodyboard is 30x30 cm. |
| 1-2 years | At this age, concentration increases. For girls, the size of the board can be increased by 10-20 cm. About 6-7 parts are allowed to be attached to the panel |
| Over 2 years old | For girls of this age, a busy board will be the most interesting and relevant. The size of the development panel should be increased. It is important to focus on the baby’s growth. The child should be able to easily reach overhead objects. |
Step-by-step instructions for making a development board for girls:
- draw a sketch of the bodyboard on paper. At this stage, it is worth deciding on the location of the structure and the number of elements attached to it;
- choose a suitable wooden sheet;
- cut and process the board according to the selected dimensions;
- decorate the base (varnish, self-adhesive, stickers);
- coat the slab with varnish and wait until it dries completely;
- consolidate developmental elements. For light parts you can use glue, for heavy parts - screws and nails;
- check the strength of fixation of the elements.
Children of different ages are interested in different things. This must be taken into account when choosing elements for a bodyboard.
Soft bodyboard for kids
It is made from soft, pleasant-to-touch fabric – felt and textiles. This is an ideal development board for little ones. A soft bodyboard is sewn by analogy with a developmental rug. Such a product can resemble a pillow or a book.
Photo: soft bodyboards
You can make a busy board in the form of a bright cube from 4 sponges, soft napkins, beads, bells, rings, ropes and other details. Each side of the cube will have an original design. Children will love this educational soft cube and will have fun playing with it.
Busyboard for girls and boys - what are the differences?
There are no significant functional differences in the models for girls and boys. They are similar in structure and shape, but differ in design.
For a girl, you can design a development board in the shape of a royal castle, a flower, or a moth. Make a themed design for your business board if you wish: for a beauty salon, laundry room, dining room.
Pink, light green, peach, and soft lilac tones are used in decoration. An interesting one would be a personal board - with a photo frame into which the girl will insert her photo, changing it as she grows up.
Photo: busy board for girls
An educational board for a boy can be made in the form of a train, car, or ship. Also offer the boy a themed board: a watchmaking, automobile or construction workshop, come up with your own version.
Choose darker, more saturated colors for decoration. Use blue, brown, red, yellow shades. Add details - locks, screws, switches, sockets. Install a car steering wheel or a bicycle bell on the bodyboard.
Features of a busy board for boys
DIY educational boards for children, as in the photo, are suitable for boys of different ages.
One of the nuances of bodyboards for boys is a set of elements in the form of nuts, screws, wheels, dials, and car steering wheels. Children are especially fascinated by models with buttons that make different sounds. A busy board in the shape of a car, ship, steam locomotive, rocket, etc. is suitable here.
You can choose images of your favorite astronauts, soldiers, and super-heroes from cartoons and feature films that are in tune with your kids’ interests. A cooler color palette (silver, blue) is suitable for decoration.
What to consider when making a busy board with your own hands
The main thing is the safety of your baby. After all, he will play independently, you will not be able to control him every minute. Therefore, if you set out to make a development board with your own hands, follow a few rules:
- securely and firmly secure the base of the bodyboard so that it does not fall and injure your son or daughter;
- secure all the parts well so that they do not come off, because children have a habit of putting everything in their mouth;
- Carefully process the base of the development board, eliminating the presence of nicks;
- there should be no sharp corners on the product - round them or use plugs;
- connect luminous objects only with batteries, do not connect to the mains;
- Tie removable items very firmly to the base using rubber bands or ropes so that the baby does not tear them off.
Little children play with the development board on their own; they learn many skills with the help of such an object. When their son or daughter grows up, they use the busy board in story games, attracting friends to them. This is how they develop the skill of communicating with peers.
Making a busy board with your own hands is not at all difficult. The main thing is to stock up on materials and tools, as well as patience. You can also involve older children after 3 years in this exciting work - they will be happy to give you an instrument or decorate their busy board as they like.
How to make a busy board for a girl yourself
When assembling a bodyboard, you need to know that the design for girls and boys does not differ. For children under three years of age, developmental boards are universal. That is, they use the same filling items. Basically they are all soft. With age, filling items are selected taking into account the interests of girls.
For girls, the bodyboard is often decorated in pink tones.
Girls over the age of three are interested in sewing accessories, pockets for the clothes of small dolls, patches of locks and animals. The child's name is written in letters on the board. It is advisable to make them multi-colored. Over time, the girl will learn to remember letters, first by color, and then by shape.
A special feature of the bodyboard intended for a girl is the color of the design. In addition to pink, orange, red, and golden shades are also suitable. A minimum of blue is used, as this background is more suitable for boys.
How to make a DIY board for girls under one year old
A baby up to one year old will be interested in a busy board when she learns to crawl confidently. This is different for each child, but from about 7 months. During this period, you want to feel everything with your hands and get to know your surroundings. You only need a soft board. Filling items use fabric stripes with cereal inside the bag. They are shaped into geometric shapes of different colors. When 9 months are reached, zippers, Velcro, and bells are added.
For the first acquaintance with the environment, patches made from pieces of fabric of different textures are suitable
A do-it-yourself busy board master class for girls looks like this:
- The frame is sewn from durable fabric. Essentially, this is a case that is filled with cotton wool, padding polyester or other soft material. To get the desired figure, first build a pattern. You can find a ready-made diagram on the Internet or relevant literature.
- The next step is to prepare the filling items. If the girl is only 7-8 months old, stripes made from pieces of fabric of different textures will suffice. The older child is interested in rattles, bows, and buttons.
- The final step is to secure the objects to the body. They are sewn and glued with a hot gun. Over time, when the girl grows up, one side of the fabric stripes is torn off, grain or plastic crumbs are poured into the pocket, and then the seam is sewn back up.
The finished business board is installed on the floor in the playroom. The girl must be able to get to him freely.
How to make a busy board for a 1 year old girl
When the baby turns one year old, she begins to be interested in three-dimensional figures. They help develop independence and coordination of movement. Filling items include pockets, soft toys in the shape of vegetables and geometric shapes. You can add wheels, rings, rotating elements, laces.
Girls are interested in thematic applications with stripes made from three-dimensional figures
The frame itself can already be made rigid from plywood, but covered with fabric. An interesting idea is presented in the photo of a busy board for girls with a house, but it is not voluminous. Two plywood boards were used for the frame. They are cut out like a house, covered with fabric and connected to each other using the book method. Exterior decoration is traditionally done with fabric stripes on doors and windows. The whole interest lies in the internal content. When the girl’s parents open the book house, inside there is an overview of household items. Here, clothespins, removable clothing, strings, and a plastic bag are added to the stripes.
How to make a busy board for a 2 year old girl
At the age of two, hard and soft objects are combined on a bodyboard. They should feel different to the touch: smooth, slippery, rough. A child of one and a half years will learn to find specific differences between objects and highlight them. You can hang pictures depicting edible and inedible objects.
At two years old, a girl is interested in whistles, clothing zippers, laces, and heavy objects tied on a rope. The child will begin to develop hearing acuity and independent actions.
A two-year-old girl is interested in voluminous houses, where you can look inside through opening elements
They make a hard bodyboard with their own hands for girls from plywood, giving the product volume. The most popular are houses. For the façade, paired blanks are cut out: two rectangles and two rectangular parts, one side of which is cut at an angle of 45° for a gable roof. They are glued together into a box with wood glue.
The tops of the cuts are connected with a batten, forming the ridge of the roof. The roof is cut out of plywood in two rectangles. Each element is fixed to the rail with loops. The roof will be opening.
Doors are cut out on the facade and hung on hinges. Hooks and latches are used as constipation elements. You can make one drawer. Each moving element is painted with a specific color.
How to make a busy board for a 3 year old girl
From the age of three, a girl should gain confidence that she can cope with anything. The busy board is complicated by chains, a switch, and a socket and plug. Bolts with easily rotating nuts are attached to the frame. Glued necks of plastic bottles onto which you can screw caps have good developmental properties.
Using the name board, the girl will learn how to spell her name
The frame of a busy board for a three-year-old girl will be a board. The workpiece is well sanded and painted in light colors. Most parts are secured with self-tapping screws or glued with a hot gun. When attaching a sound toy, the batteries are hidden on the back of the board unless there is a place for them inside its body.
Advice! A three-year-old child can stick numbers and letters on the board. A good idea would be to make a personal board with the name of its owner.
Photo: children's educational boards
You can share or save for yourself:
Discussion of the article:
- Any:
01/28/2019 at 08:38Yeah, everything is written out so simply. We waited a year for our dad to “give birth” to a business board for his son. It didn’t go further than buying a board and a couple of locks; the blank was just lying around on the balcony. There was no time to study. In the end, we bought it ready-made and everyone is happy. Both our son and our father.
- Stanislav:
02/07/2019 at 09:24
But my friend turned out to be stubborn. I did it, but clumsily - I have no skill in such work. At first glance this is what you want. In general, my friend’s wife spat on the expenses already incurred and bought a factory bodyboard at 1.5 times cheaper. If your hands grow from the wrong place, then you shouldn’t take it